Vlieseline 276 – Natural Cotton Wadding

Towards the start of this year I was hoping to host a Sew A-Long (SAL) series of blogs on my website Strictly Quilting. Well, sometimes life gets in the way by throwing the odd curve ball and I found things didn’t quite work out the way I’d planned. I’d started the design, based on star blocks, and slowly (very slowly) managed to get the design together.

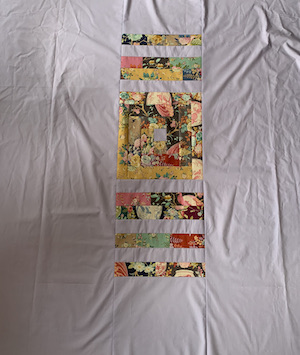
As I’m sure you know, quilt blocks have a variety of names, frequently more than one, and I used blocks based on dessert names: French Silk Pie, Blueberry Pie and Peach Cobbler. I also added Love in the Mist and a few Friendship Stars as fillers. The whole quilt is now named ‘Galaxy’ and I am still planning on publishing it as a free SAL soon. (You can follow me on my website, Strictly Quilting, and get updated when I publish it, a block a week.)

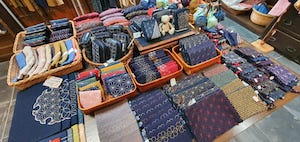
I finally finished the quilt tops last week. One is made with a white background and a second with a black background. Both are ideal to use up scraps or can be made from meterage. The fabrics I used were from a selection of 10” square fabric samples from Makower, in rainbow colours. So now it came to layering and quilting.

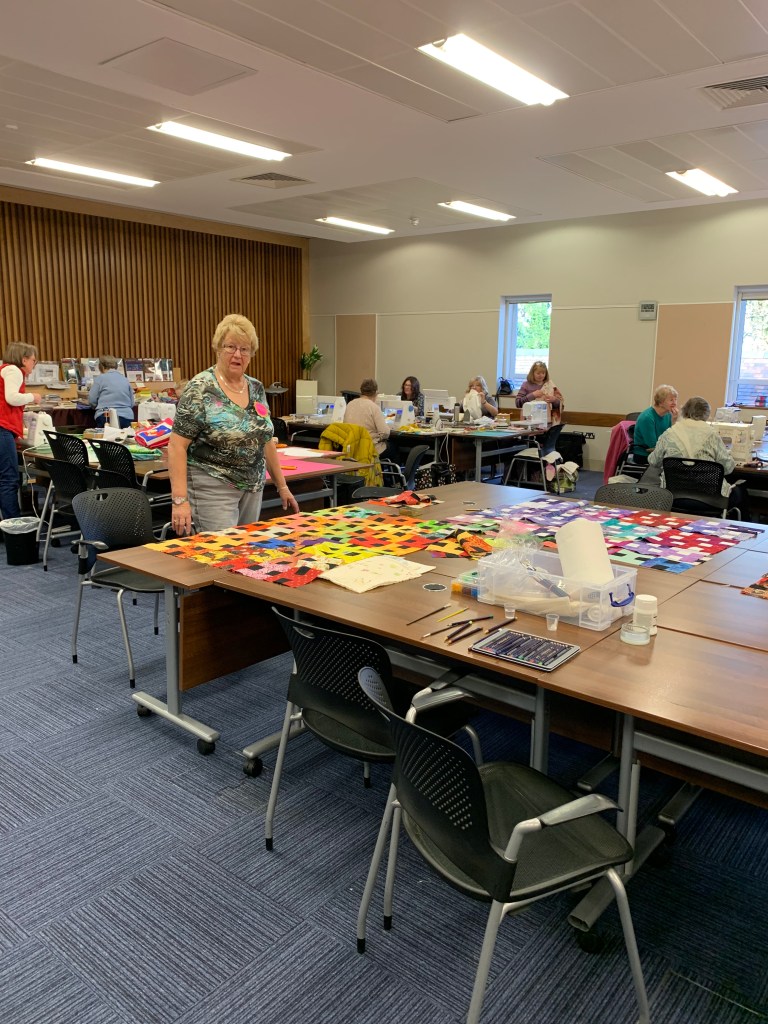
Vlieseline sent this beautiful wadding for me to try and decided this would be the perfect project to trial it. As the wadding came out of the package, I was surprised at how beautifully soft it felt. The class of students that were with me at the time were all impressed by the feel with lots of ‘ohhhs’ and ‘ahhhs’ as it was passed around to feel. It drapes well and is, I have to say again, so soft! It’s got ‘body’, feels more substantial but is still lighter in loft meaning it’s not too puffy

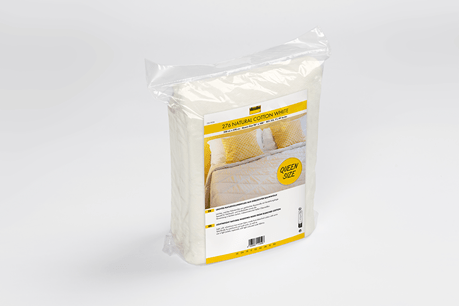
The wadding is white, perfect for the white background quilt. If you use a cream wadding when you have white fabrics it can sometimes show through, making the pure white fabric a bit dull. Using a white wadding, you end up with a crisper white quilt. 

The scrim holds it well and there doesn’t appear to be any bearding. This is when fibres from the wadding come away and you end up with them everywhere. (Think hairy dog getting fur all over the sofa! The scrim helps fix the fibres in place.)

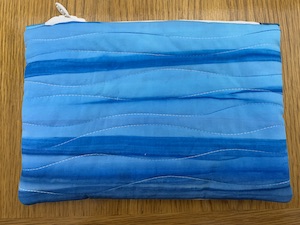
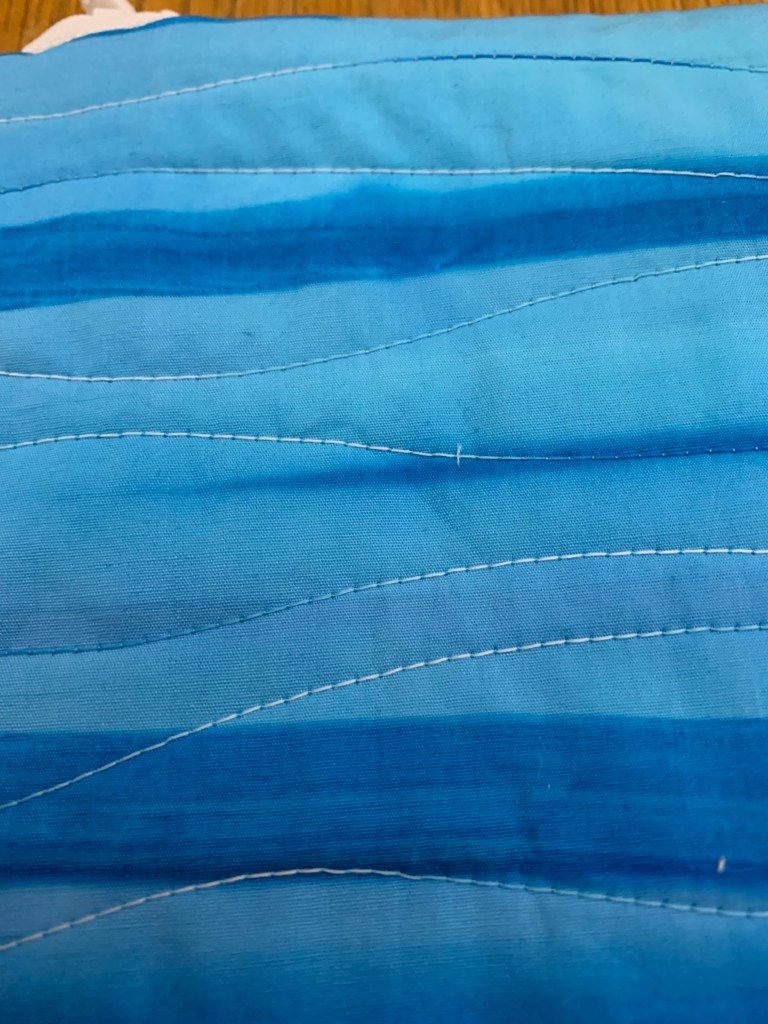
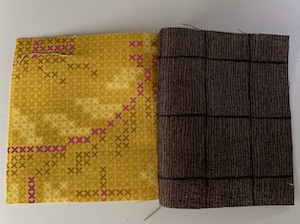
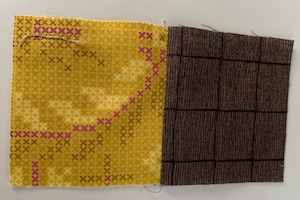
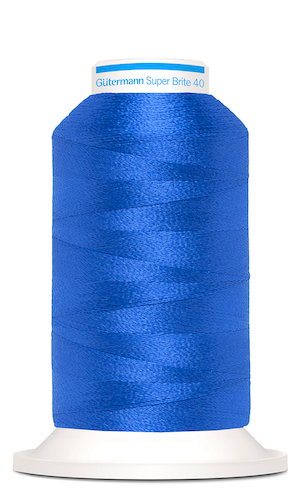
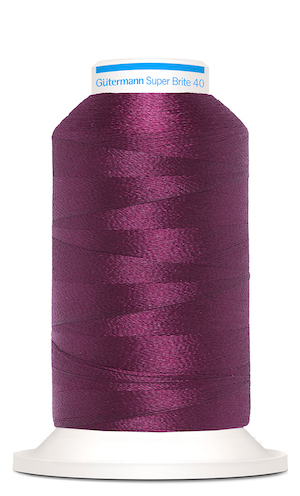
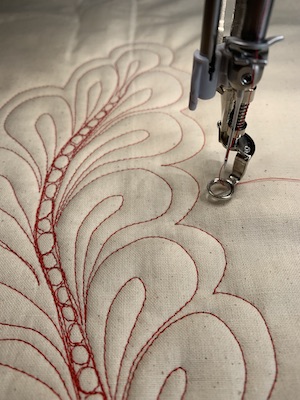
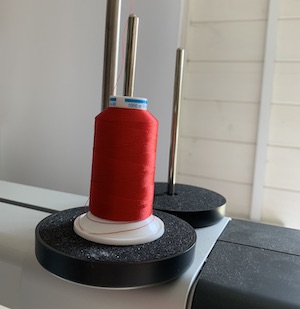
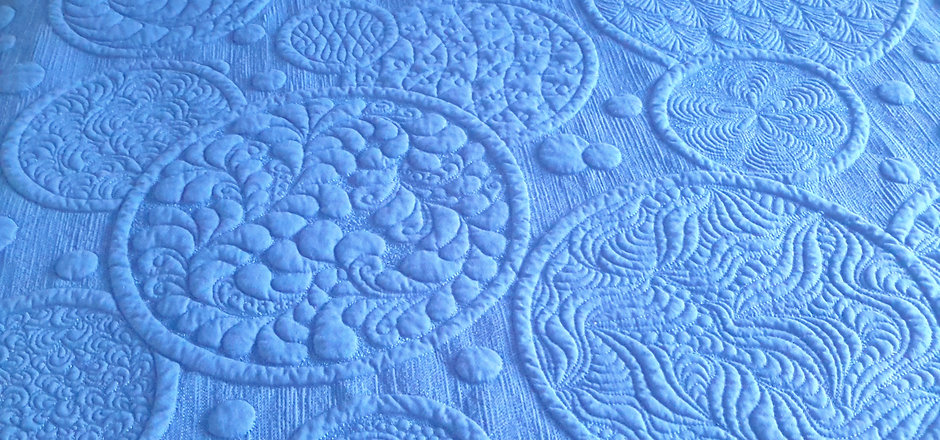
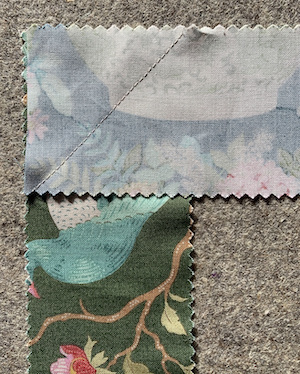
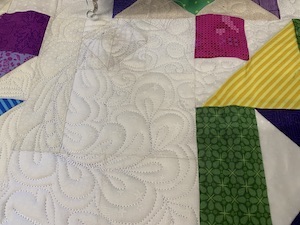
For Free Motion Quilting, you can use two layers of wadding, so I layered up the backing, two layers of wadding and the top. Talking of backing fabric do you all do what I did? I was looking for the perfect backing fabric. Found a lovely, beautifully rich purple with gold highlights which was just too nice to use. I had to give myself a stern talking too! Anyway, using two layers of wadding means that when you knock back areas with heavier quilting, the un-quilted areas really stand out. I’d used a purple in the bobbin and a white thread on top. You can see a tiny hint of the bobbin thread which I’d intended to act as distant stars, similar to the Milky Way across the sky.

The wadding is washable, at 30 degrees and it does say that it should not be used in a tumble dryer. (That probably won’t stop me from throwing it in for a minute or two on a low setting to help fluff it up but please, follow the instructions rather than me!) The quilting distance is a recommended 10cm which might be a disadvantage to some. I was quite surprised to be honest, this isn’t a great distance when most modern waddings with scrim have a quilt distance of up to 10”, closer to 25cm. The difference doesn’t sound much but if you are a beginner, doing less quilting is quite appealing. 

Overall, this wadding has a lovely feel, drapes well and is certainly one to keep in mind.

Gütermann Deco Stitch

Gütermann is one of the most popular thread producers having been around for decades. As a girl, the chap that used to service our sewing machine always recommended Gütermann thread and I still use it for a lot of my piecing and dressmaking. They have a wide range of threads and one is Deco Stitch. 

Deco Stitch is designed to work well with domestic sewing machines decorative stitches. You can use it on the top with a sew all thread on the bottom if you wish. I was sent some to have a play and see exactly how I could use it for quilting. It is 70 weight, so at the lighter end of threads but this means that it will not bulk out too much and will form the stitches evenly but what to do with it?

I lost my Mum earlier this year. We started patchwork and quilting together over a decade ago when we took up a beginners class and it always was a shared passion. This led to a  weekly class where we made good friends with our group, who I still see, day trips to the local shows and she came to every retreat I organised. When you loose a quilter, or any crafter, there is the bitter sweet task of sorting out the ‘stash’. I have plenty of UFOs (Un-Finished Objects) and she had a few too! One of these was a cross-stitch of Nemo, the little fish from the movie. She had started this about eighteen years ago as a gift for a little girl called Alice, who LOVED Nemo. When I found it, all those memories of watching the film endless times came rushing back and I remember Mum saying she was making the picture. She hadn’t quite finished it with only a few outlining stitches missing, so I asked Alice (who is now 22) if she would like it. She was delighted but wanted it to be made into something. Her other request was that I not complete the image, leave it just as Nanny Pat had left it. 

The image was the perfect size for a small purse, perhaps for make up, so this was what I decided to make. I also had a sparkly zip in my stash which would work brilliantly. Next, I had to find some fabric which matched the image and when I came across the stunning blue, it was perfect; Nemo swimming in the sea. I then looked around for thread and this is when the Deco Stitch came in useful. I had a variegated version in blues which I decided to use for quilting the little bag. 

The thread worked really well, showing up on the ‘sea’ as I quilted wavy lines. Initially I was going to play with some of the decorative stitches but, as the fabric was so lovely, I felt it might not have worked. Sometimes, simple is best. I also echo quilted around the Nemo figure, simple to hold that side down. 

Deco Stitch is a versatile thread that is useful to have in your thread stash and comes in a range of variegated colours which work brilliantly for those decorative embroidery stitches. So, if you have never used those stitches why not have a go with Deco Stitch.  

Detail of quilting

Clover Finger Presser

Many of you that have visited me at Strictly Quilting HQ know that I love a Hera Marker for marking lines, especially when quilting. I’ve found them useful for both hand quilting and, more recently, for marking for Free Motion Quilting on my beautiful new machine, Queenie. I can do straight lines or curves, use templates or go around shapes. They’re great!

But now I’ve come across a new little tool from Clover – the Finger Presser. 

For perfect piecing we really should iron/press each seam usually ‘to the dark side’. Of course I’d like to do this every time but actually getting up, leaving the iron on, then returning to the machine… It’s a pain.  And if you are hand piecing, again, it can be annoying to go to the ironing board every seam. This is where the Finger Presser comes in. 

I’ve seen these little things before but hadn’t tried one before. Well, it has won me over. I was stunned at how well this worked. Made from a solid, durable material it sits well in the hand. There is a lovely little impression in which your finger rests. The edge can be used to fold against and the other end had a point, again I’ve used to mark lines. Below you can see a before and after using the tool. A crisp press without an iron.

Use the Finger Presser by applying pressure down the seam line. This folds over the seam allowance with surprising crispness. You can find out more about Clover products at – www.clover.mfg.com 

Gütermann Super Brite Thread

There are many threads we can use which bring added glamour to our Free Motion Quilting. I’ve not used Gütermann Super Brite before so, when they sent me a sample to try, I was keen to have a go.

Gütermann Super Brite has a trilobal structure – a triangular shape which means there are flat sides from which light reflects. (I had to look that up – I’d always wondered what it meant!) This ensures that you get a glorious shine which, coupled with the beautifully luscious colour, will add depth to your quilt designs.

They recommend that this thread is ideal for machine embroidery motifs and I agree it would be perfect (especially as there are 288 colours to choose from) but, being a quilter, I decided to trial it on my sit-down long arm, Queenie, a Bernina Q20 at Strictly Quilting HQ.

The Festival of Quilts was held a couple of weeks ago and I managed to catch one of Angela Waters talks – Fabulous Feathers. Here Angela talked us how she undertakes feathers, both individual and bump-back. Slightly different methods of crafting Free Motion Feathers. I love doing feathers from large explosive space filling ones to small, delicate whips which intertwine with other patterns. This was the inspiration for a little practice with this new thread. 

Ten minutes a day is recommended to develop your Free Motion Quilting. Do I undertake that? No chance. Too busy working but I do keep practice squares made up so when I do find time, I can just grab one and have a play. Calico layered with one or two layers of wadding. I usually cut them to about 12” to 18” square and use the cut offs from my quilts. This is a good size for practice and I also use a strong colour thread. Luckily Gütermann sent me a strong Christmas red. Using a thread with a big contrast means that you can see all the different twists and turns. Don’t be afraid of this, it’s the best way to practice and improve.

But back to the thread. Made from 100% polyester, this thread is strong and hard-wearing. I found it went through my machine effortlessly with no tearing or threading, which can happen with long-arms due to the speed of free motion. Another positive is that it’s washable at 60 degrees. Now, I don’t wash my quilts at 60 but it’s good to know it would stand up to it. The many colours it comes in means that there is sure to be one to suit any project. They recommend using a needle between 70 and 90. The thread is 40 weight but runs finer and there is 1000m on a reel. Not bad for the price of around £5.50 a reel. I’ll be looking up these threads to start building a collection and can recommend it for Free Motion Quilting. 

Follow @gueterman_creativ_uk

For stockist information, contact Gütermann creativ –

email: gutermann@stockistenquiries.co.uk

Summer Retreat is Nearly Here!

Cecilia Slinn and myself are getting excited now, our Summer Retreat is just around the corner. A weekend of sewing.  Single en-suite rooms, wonderful meals cooked for you and the company of like minded crafters. The Summer Retreat (21st to 23rd July) is nearly here and we have a couple of places left. We are hosting at Hillscourt in Birmingham which is only minutes from the motorway network. Two experienced, award winning tutors are on hand all weekend – Cecilia Slinn and Helen Kent – plus two workshops. Cecilia project is Wonky Courthouse Steps in which we will learn to piece curves and Helen is teaching Cathedral Windows. Both of which are great stash busters. We also have Andrea from Black Mountain Fabrics bringing a pop up shop just in case you feel the need for a bit of retail therapy. All of this for just £375. If you would like to book or more details, drop me a message – email helen@strictlyquilting.com 

Sashiko and a little trip to Quilts UK.

The art of Sashiko been a big trend over the years and Clover has the perfect needles for your projects. I’ve always wanted to have a go so, when Clover sent me some to try out, I was eager to start. For those that aren’t familiar with Sashiko, it is a stitching technique developed in Japan and was used to repair and strengthen clothing – thus creating Boro stitching where fabric is applied to mend clothing. The designs are ordered, repeated geometric shapes with a precision to the position of the stitches.  

As luck would have it, some close friends took a trip to Japan earlier this year. The photos and the experiences they returned with were enviable but the one thing that I was really jealous of was the Sashiko shop they came across. 

What a treasure trove of beautifully crafted work: From cushions to umbrellas, wallhangings to kitchen items and fans. The different patterns which make this needlework so distinctive can be seen. As a gift they very kindly brought me back a skein of Sashiko thread in white, although you can get it in a rainbow of colours and even some with a little sparkle. Sashiko thread is not like the embroidery threads we commonly use. It is a single wound strand which would move with the base fabric and leave the repaired item stronger than it was originally. The stitching also added warmth to the garment. 

But what design should I choose? This is where a good book is always a worthwhile investment (and a good option for your birthday/Christmas gift list, which is what I’d done last year.) Susan Briscoe is renowned for her work in this field and so I turned to her book, ‘Sashiko 365’. A different design for every day which can be used to make a sampler quilt or as design inspiration.  

So, what makes these needles special? Coated with a Gold-Eye plating, these Sashiko needles have a unique elliptical design for easy threading. The sharp point allows the needles to smoothly glide through the fabric while the extreme toughness of the steel makes the needles virtually impossible to bend or break.

The needles were certainly easy to thread and the steel slips through the fabric so easily, like the proverbial knife through butter. They are truly beautiful to use; strong, smooth and sharp. As it happened I visited the Quilts UK show at Malvern shortly after receiving the needles so I invested in some beautiful fabric to try out Sashiko. Susan herself was at the show with her book so I was able to have a little chat with her about it. And when I say I had to ‘invest’ in some fabrics and threads – what did I buy? I started with choosing some different threads. A multicoloured skein and some pastel coloured threads with a hint of silver. I couldn’t resist one of her printed Sashiko panels which has been brilliant as an introduction. A selection of fabrics which Susan called her Northern Lights collection and a printed fabric pack to extend my Sashiko experience into Boro…That’s for another blog but for now, I’m hooked! 

If anyone is interested in an introductory session on Sashiko, let me know and we will arrange a workshop.

Clover Sashiko Needles are available in two types, both packs containing assorted sizes.

Sashiko Needles (CL2007) 8 per pack RRP £5.06 approx. 

Sashiko Long Needles (CL2009) 3 per pack. RRP £3.96 approx.

For stockist information, contact Clover email: clover@stockistenquiries.co.uk 

Happy New Year

My goodness this year went quickly and what a year it was. Increasing the sewing classes, taking on a Ukrainian family, running the first retreat along with several other workshops, hosting the Block Drive in September for Quilts for Care Leavers along with continuing blogs for UKQU, not to mention the new machine which arrived in time for my birthday – I fell that my feet haven’t touched the ground.

But over the Christmas season I find a little reflection for the past and future is not a bad thing. This year has seen the Sit and Sew sewing groups filling up steadily with Mondays and Fridays being mostly full. There are still spaces on Wednesdays (which was initially meant to concentrate on hand sewing but…..) These all run from 10 to 1 and are pay as you go. (£17 a session.) The retreat went very well, with great feedback, and I have also been running some daylong workshops on a weekend for those that are busy in the week. These started with the Doris Sampler Quilt course but will continue from May onwards in a more personal format, working on different techniques and designs that take our interest.  

Doris Sampler Quilt

So what does Strictly Quilting have planned for this year? Off the back of the Doris course I’ve been running, I’ve been asked to do a Block Of the Month (BOM) so I’ve been swiftly designing a quilt which will be free to follow on Facebook or via my blogs. Like my Facebook page and follow my website to ensure you don’t miss it.  I had planned on running a similar UFO a month, Un-Finished Object, where we make a list of the projects we have and work through those… This may happen slightly later in the year as I’ll be adding to the UFO pile with the new BOM!!!

The first course coming up quickly is the Free Motion Quilting with Cecilia Slinn. This will be the second time Cecilia has run this course for me and I am looking forward to it just as much as the first time.  This is going to be held at the local village hall of Mitchell Troy on three Sundays from 10 to 4, February 5th, March 5th and April 2nd. A buffet lunch, along with refreshments, is included so you can concentrate on learning this new skill and enjoy the experience.  This has proved popular and I only have four places left remaining so if you are interested, do get in touch.   

We also have booked a further two retreats as the first was so successful. For these, Cecilia and myself collaborate providing support and mini workshops throughout the weekend.  We arrive at Hillscourt Conference Centre on the Friday lunchtime and end Sunday afternoon with plenty of sewing time, full board and accommodation in ensuite single rooms. I cannot recommend retreat weekends enough. The first is in the summer – 21st to 23rd July and we will have mini workshops around Cathedral Windows, in various techniques and Wonky Log Cabins where we will look at dealing with curves.

The second retreat, in the winter – 8th to 10th December, will be looking at quilting in all its forms: Free Motion Quilting; Hand Quilting; Big Stitch; Walking Foot; Tying. We will still sew our own projects but if you’ve wondered about the different quilting forms, designs or want some quilting advice, then this is the retreat for you.

I am also hoping to host some Charity Sew Days – I could do with some help putting together some of the charity quilts so, if you fancy a day sewing blocks together to give Care Leavers a gift at Christmas, then let me know. Again, dates will be released via Facebook or blogs.

All in all this year is beginning to look as busy as the one just gone but for now, all that remains is for me is too wish you all a very happy and prosperous New Year. 

Free Motion Quilting Course

We are pleased to announce that we will be running the popular three day, Free Motion Quilting course with guest tutor Cecilia Slinn again in the New Year.

Throughout the course Cecilia will take us through the machine set up, talk about designs and different ideas with the group, with lots of time for guided practice.  Different design ideas are covered throughout the course including working with grid patterns, all over larger designs and, my favourite, feathers in various guises. The three days are spread across three months to allow time for practice and a little homework between each.

You can see some examples of Cecilia’s work on her website here. Her work was recently on display across the country at the Grosvenor Quilt Shows as one of the guest exhibitions.

The workshops will run on Sundays on 5th February, 5th March and the 2nd April at Mitchel Troy Village Hall from 10am to 4pm. A buffet lunch and refreshments are included in the price which is £180 for all three days.

To book email Helen@strictlyquilting.com.

Lazy Log Cabin with Chic Escape

This range has to be one of my favourite in recent months. Brought to us from Tilda it pairs classical flowers with peacocks with a beautiful palette of rich colours. Pinks, mustards, greens and blues.  When I was sent a strip roll of this gorgeousness I knew that I wanted a quick lap quilt to snuggle up with through the Autumn.

Lazy Log Cabins are a great way to use a strip roll for a quick quilt and if you don’t have a strip roll you can cut fabrics into 2 1/2” strips. I used some of the coordinating plain in lilac for the centre of the blocks and as the cornerstones of the sashing. Lazy Logs is a technique which falls into the area of improv – no measuring, just sew and trim. I did plan a little – dividing the fabrics into colours, putting all the pinks, greens, blues, yellows and greys together. I then ensured that each side of the blocks were worked from the same colour group. 

The roll gives enough for ten 14 1/2” blocks, nine were used for the front and I used the last one on the back, along with the leftover scraps to bulk out the back as I didn’t have quite enough of the lilac. This does add interest to a plain backing and ensures there was no waste at all as every piece was used. The roll also gave enough for the binding which I pieced from the left over pieces that were longer.  

Lazy Log Cabin Quilt. 51″ Square – An ideal lap quilt size.

Now here is where I confess I haven’t finished it yet as I am waiting for delivery of my new long arm but I have it ready to practice on as soon as it arrives.

Here’s how to make your own. 

You will need one Tilda Chic Escape or similar strip (Jelly) roll.

2m of backing/cornerstones fabric.

60” square of wadding.

Divide your fabrics into the colour groupings.  Pinks, blues, greens, greys and yellows.

Set aside 6 strips for the sashing. Sub cut each of these into three, 2 1/2″ by 14 1/2” rectangles. I chose the pale background strips for my sashing.

From plain cut 26, 2 1/2” squares. 10 for your central squares of the block, 16 for the cornerstones of the sashing. 

To make the Lazy Logs take a 2 1/2” plain fabric square and place it right sides together with the first strip at one end. Join with a scant 1/4” seam. Repeat with the remaining 9 squares.  I joined two at a time to the same strip but you could mix and match them.

Cut the strip level with the squares.  Press the seam to the ‘dark side’. Take another strip and place right sides together and repeat. Continue joining strips working your way around the block.  I continued to add twelve strips which gives a 14 1/2” block, rotating around the central square. 

A slightly different take would be to make Courthouse Steps by adding to the opposite sides of the square. 

Take the sashing strips and join the Cornerstones to make four sashing rows, alternating square with rectangles.

Adding Cornerstones to Sashing rectangles.

Join the remaining sashing strips to either side of the blocks to make three block rows.

Join the rows together with the sashing rows.

The backing was pieced using the left over block and strips.

Join the longer strips to make enough binding.  You will need a length of 210” for continuous binding.

Layer and quilt as desired. 

New Toy Alert! – Clover Fabric Tube Maker

I am a sucker for a new toy, especially when they actually make light work of a tricky task.  The new Clover Tube Maker is one such item that I was lucky to be sent from Groves.  A little device, similar to bias binding makers, which folds over both fabric and wadding to make a combined fabric tube.  You can use these combined tubes to make things such as the strip roll (or Jelly Roll) rugs that have been popular recently but also mats, bowls, baskets and bags.

One of my students wants to make one of these rugs and I’ve always wanted to have a go too. I have been collecting strips of fabric, ideal for using up left over binding strips, and cutting left over wadding into strips with this in mind.  

At first I was a little confused about how to make it work or fit the fabric in but checked out the very helpful and clear YouTube video from Clover demonstrating exactly how to use it.  You can find that here.

You start by joining all your strips of fabric and wadding together. First, join the strips in the same way as for binding with a angled seam to help spread the seam allowance.  You can join the wadding by butting the edges and zig zag across the join. Do not overlap the wadding which would give you a ridge which we don’t want.   

Take the 2 1/2” strip of fabric and the 2 1/2” strip of wadding and layer them together. Wadding on the wrong side of the fabric. The maker is made up of four plastic gadgets which clip together into pairs, a larger pair and a smaller pair.  The fabric and wadding strips feed through the gadget which folds as you go to form the tubes. The tube is then fed through your sewing machine and you sew the tube as it forms. 

It is recommended that a thinner wadding is used but I used out a variety of left over waddings – 80/20, pure cotton and bamboo – and all went through smoothly.  

I have been gathering strips to make enough for a good sized rug. You can see I’ve selected a colour palette of greys through pinks with a little green. I did try and keep the darker colours on the outside of the strips as this will be the area of a rug that will collect most dirt.

You can find many YouTube videos to watch on how to make the rugs, some round, some oval and I found a rectangular one too which cut lengths of the fabric tubes and joining them rather than sewing all in one piece.  This would be useful to make rectangular table mats too. It is recommended that you press every round when attaching the fabric tube to help keep it flat at sometimes they can curl upwards when making the mats.  

My Colour Selection

If you have wondered how to make one of these rugs, just grab one of these Clover Fabric Tube Makers and get going.